


Ensuring Home Efficiency: The Importance of Duct Leakage Test
Understanding Duct Leakage Test
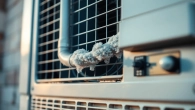
What is a Duct Leakage Test?
A Duct leakage test is a diagnostic procedure used to ascertain the amount of air that escapes from a duct system in a building. It measures the integrity of the ductwork by determining how much air is lost through leaks and other imperfections. This test is typically conducted by experienced technicians who use specialized equipment to analyze the duct system’s performance and identify areas that need improvement.
Essentially, the test involves pressurizing or depressurizing the duct system while the technician measures airflow. The differences between the controlled and the actual airflow help to pinpoint leaks, which could significantly affect a building’s energy efficiency, indoor air quality, and overall comfort.
Importance of Duct Leakage Test
Knowing the state of your duct system can profoundly affect your home or business environment. The importance of a duct leakage test cannot be overstated, particularly in terms of energy efficiency and cost savings. Here are several key benefits:
- Energy Efficiency: Leaky ducts can drive up heating and cooling costs, leading to unacceptable energy consumption. By identifying and sealing leaks, homeowners can experience considerable reductions in energy bills.
- Comfort Levels: A well-sealed duct system provides a consistent temperature throughout the home, ensuring comfort in every room. Duct leakage can cause hot and cold spots, making certain areas of a building less comfortable than others.
- Improved Air Quality: Leaks can allow dust, allergens, and other pollutants to enter the duct system, leading to poorer indoor air quality. A duct leakage test helps in identifying such pathways, enabling users to take corrective measures.
- System Longevity: Addressing duct leakage issues can extend the life of HVAC systems by reducing the workload on these units. When ducts are inefficient, HVAC systems overwork to maintain temperatures, leading to premature wear and tear.
Common Methods Used in Testing
There are several methodologies employed to carry out duct leakage tests, each offering unique insights into the ductwork’s condition:
- Blower Door Test: This method utilizes a specialized fan to create a pressure difference between the inside of the building and outside. By measuring how much air escapes through the ducts, technicians can identify problem areas.
- Post-Test Inspection: After the blower door test, inspectors can visually check ductwork for obvious signs of leakage such as disconnected ducts or damaged insulation.
- Pressure Pan Testing: This method involves attaching pressure pans to supply registers to measure the airflow at different points, which helps identify underperforming ducts.
Signs Your Home Needs a Duct Leakage Test
Increased Energy Bills
One of the most telling signs that a duct leakage test may be necessary is an unusual spike in your energy bills. If you notice that your heating and cooling expenses have suddenly increased without any change in usage patterns or local utility rates, it could indicate that your duct system is leaking air, forcing your HVAC system to work harder than necessary.
Uneven Temperature Distribution
If you frequently experience temperature variances throughout your home—some rooms are hot while others are cold—this could be a sign of duct leakage. Leaks can lead to insufficient airflow in one area, driving discomfort and a lack of uniform heating or cooling.
Unusual Noise from Ducts
Many homeowners report strange noises coming from their HVAC systems, such as whistling or banging sounds. These often arise from air trying to escape through duct leaks or from debris lodged inside the system, both of which can indicate the need for a duct leakage test.
Preparing for a Duct Leakage Test
What to Expect During the Test
When preparing for a duct leakage test, you can expect a systematic approach. The technician will first evaluate your HVAC system and duct layout to understand the configuration and identify potential trouble spots. Then, during the actual testing phase, they will set up the necessary equipment, typically including a blower door and pressure gauges.
The test will take roughly 1 to 2 hours, depending on the complexity of your system. Results will be gathered and analyzed in real-time, allowing for immediate identification of leaks and inefficiencies.
Common Preparations to Make
Before the test, you can facilitate a smooth process by ensuring the following:
- Clear the area around vents and registers to give technicians ample space to work.
- Inform your technician of any past issues you’ve had with your HVAC system, such as unusual noises or airflow issues.
- Ensure access to your ductwork; this might require moving furniture or other obstructions.
What Equipment is Used?
The effectiveness of a duct leakage test largely hinges on the equipment used. Some common tools include:
- Blower Doors: These are used to create a pressure differential within the building, allowing the tester to measure air leakage effectively.
- Manometers: Devices used to measure air pressure differences, helping identify leaks and the effectiveness of duct repairs.
- Flow Hoods: Used to measure the airflow at registers, providing insights into how much air reaches various parts of the system.
Interpreting Duct Leakage Test Results
Understanding the Metrics
After a duct leakage test, it’s essential to interpret the results correctly. Common metrics to look out for include:
- CFM (Cubic Feet per Minute): This figure indicates the volume of air leaking from the ducts. The higher the CFM, the more significant the leakage issue.
- Percentage Leakage: This metric shows the total duct leakage relative to the total airflow from the HVAC equipment. Ideally, you want this percentage to be as low as possible.
Common Findings and Their Implications
Test results can lead to various outcomes. Common findings might indicate that leaky ducts are responsible for a significant percentage of airflow loss. This could necessitate immediate fixes such as sealing ducts or improving insulation to optimize the HVAC system’s performance and enhance energy efficiency.
Next Steps After Testing
Following the analysis of your duct leakage test results, there are several paths you can take:
- Addressing Identified Leaks: Engage professional duct sealing services to rectify documented air leaks.
- System Optimization: Consider potential upgrades to your HVAC system if the leaks indicate older, less efficient duct designs.
- Regular Maintenance: Schedule ongoing inspections to monitor any future leakage issues.
Best Practices for Duct Maintenance Post-Test
Regular Inspection and Maintenance
To prevent future duct leakage, regular inspection and maintenance should become part of your home care regimen. Routine check-ups allow for early detection of potential leaks and keep your system operating efficiently.
Improving Airflow Efficiency
Improving airflow efficiency can often be achieved by cleaning ducts and ensuring unobstructed airflow at registers. Strategic placement of vents can also enhance airflow, increasing overall system efficiency.
Sealing and Insulating Ducts
Utilizing high-quality materials to seal and insulate ducts is critical for preventing air leakage. Techniques such as duct mastic applications and specialized sealing tapes can markedly increase the integrity of your duct system, thus improving performance and energy efficiency.


Leave a Reply